
Wheel Spacers
Lets say that youre in the market for wheel spacers. Whether its because youve added jumbo brakes, sprung for a set of custom wheels, or just want to widen your cars stance (the VIP look), youve concluded that spacers are going to do the trick for you, and will solve your fitment dilemma.
Typical Wheel Spacer Thickness
Looking at the available wheel spacers and their wide range of thicknesses, your next question is "which thickness of spacer is going to best serve my needs?" You need the Goldilocks spacer: too thin, and you will still have wheel/caliper interference. Too thick, and your tires will hit the fenders. "Just right" will give you the brake clearance you need while avoiding fender rub.

A quick glance at the various spacers on our website reveals that thicknesses vary from about 1/8" all the way up to 1" or more. Size matters! You need to be absolutely certain that you are getting the most appropriate size. A difference of only 1/4" or less can make or break your fitment.
How To Determine Exactly How Much Wheel Spacer Size You Need
This method involves the use of regular hardware-store type washers. If youre a home handyperson, you may already have a variety of sizes on your shelves already. If not, you can visit any hardware store or review our selection here. You want to use plain flat metal washers, NOT lock-washers, split washers, or plastic washers.
 Using plain flat washers is an easy, effective way to determine the precise amount of spacer thickness needed for your vehicle configuration. They can be used on disc or drum brake setups.
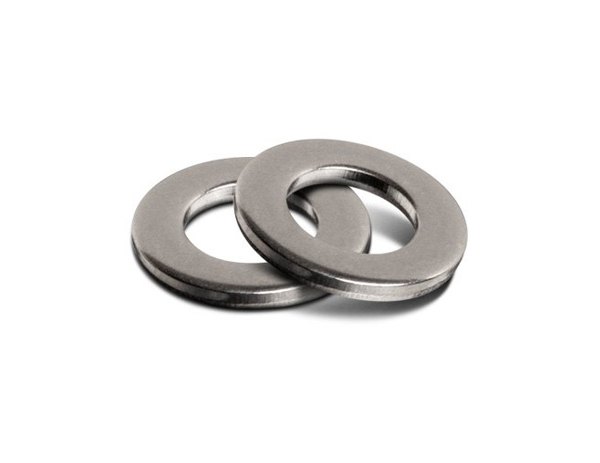 When using plain flat washers, be sure the opening in the center (the "inner diameter") is large enough for the washer to fit over your wheel stud or bolt.
Make certain that the washers you buy have an inner diameter (ID) large enough to pass over your vehicles wheel studs or lug bolts. Since we’re temporarily using the washers to simulate wheel spacers, they must fit. Washers are sized by inner diameter, so for example, a 5/16" washer is designed to be able to fit over a 5/16" diameter bolt. (The washers inner diameter is actually slightly oversize to provide some tolerance.) Washer thickness varies, from approximately 1/16" to 3/16".
If Your Vehicle Is Equipped With Lug Nuts
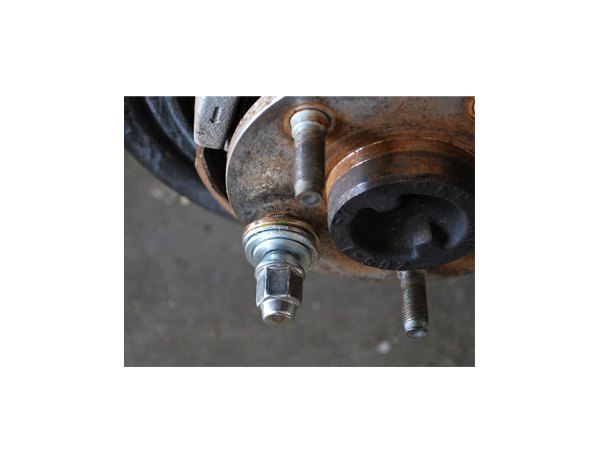
Heres the method: if your vehicle is equipped with wheel nuts (and therefore has studs which project out from the hub), begin by placing an equal number of washers on each stud. Start small, and place only one or two washers on each. Test-fit the wheel. Be very careful of your wheel/caliper clearance! You dont want to damage new parts, so dont rotate the wheel. If you need additional clearance, add only one additional washer at a time onto each stud.
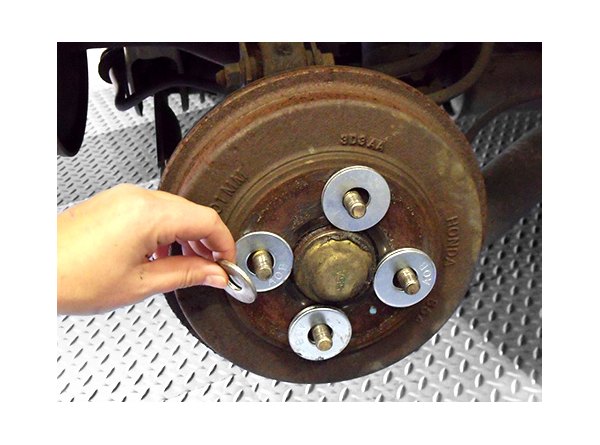 Here, we are adding a 2nd washer to the last of the 4 studs. Add washers one set at a time, and test-fit the wheel each time until you get the additional space you need.
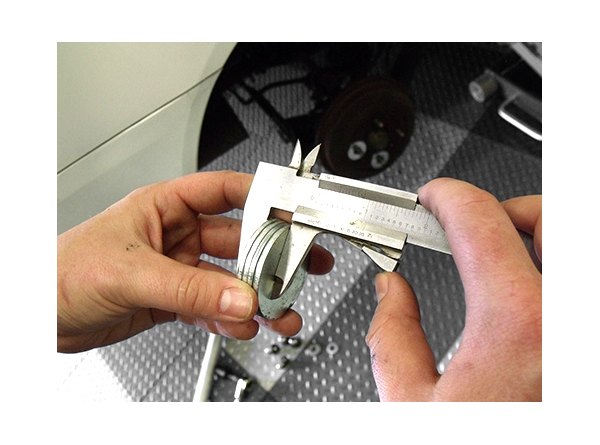 For the most accurate measurement, use a Vernier caliper. Here, our washers measure out to be 7/16", so that is the size spacer we need.
Remember that as you add spacers to clear potential caliper interference, you are pushing the wheel/tire combo closer to the fender. Dont solve one problem and create another; you need adequate clearance on both sides.
If Your Vehicle Is Equipped With Lug Bolts
If your vehicle uses lug bolts (which tighten into threaded holes in the hub), our method is slightly more cumbersome, but still doable. In this case, pass all the wheel bolts through the wheel, then add washers to the bolts on the back side of the wheel.
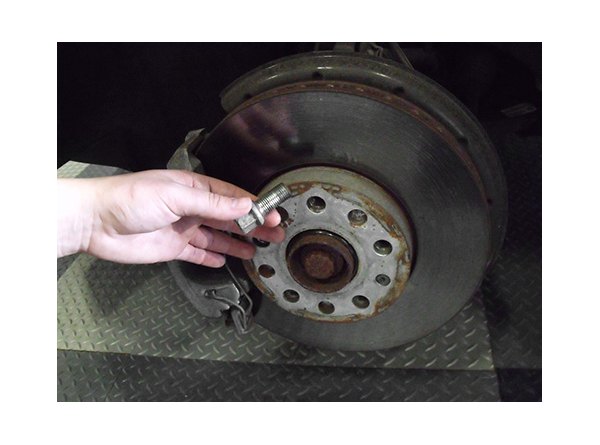 Many European vehicles use wheel bolts which screw into threaded holes in the hub, as on this VW.
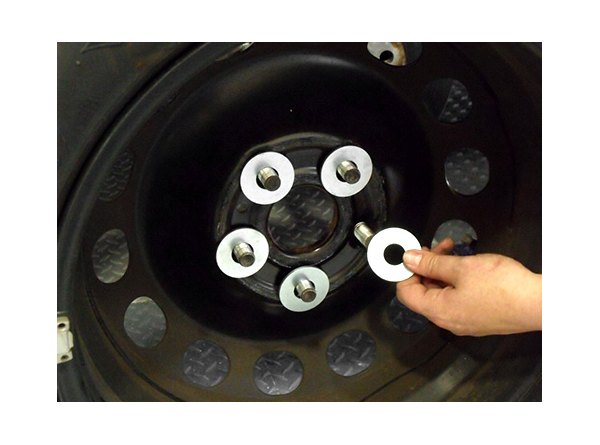 With all the wheel bolts inserted through the wheel, install washers on the back side of the wheel, then test-fit to the car.
You need to keep the wheel oriented vertically so that the washers dont fall off the bolts. Install the wheel, and add/subtract washers as discussed above. When you are happy with the fitment, measure the total thickness of the washers used on one wheel bolt.
Thread Engagement
When installing spacers, whether your ride uses wheel nuts or bolts, there is one more important consideration - "thread engagement". This refers to the number of threads which are covered, or engaged, during installation. Although the exact measurement varies by stud/bolt size, in general, the bolt or nut should turn from 6.5 to 8 turns during engagement. The use of any spacer much thicker than 1-2mm (0.04"-0.08") may prevent full thread engagement, and additional action would be necessary.
 These 4 washers, while mimicking the spacer thickness we need, also take up considerable room on the wheel bolt. Either longer bolts, or an adapter plate will be needed to ensure proper thread engagement.
You have several options. Sometimes, longer bolts or studs can be used. One variation on this theme is "ET" (extra thread) lug nuts. These are commonly used when lug studs are just a little too short. They have a small "shank" that protrudes into the wheel past the lug seat, providing the extra thread contact you need. Note that the lug hole in the wheel must be able to accommodate the ET lug nuts.
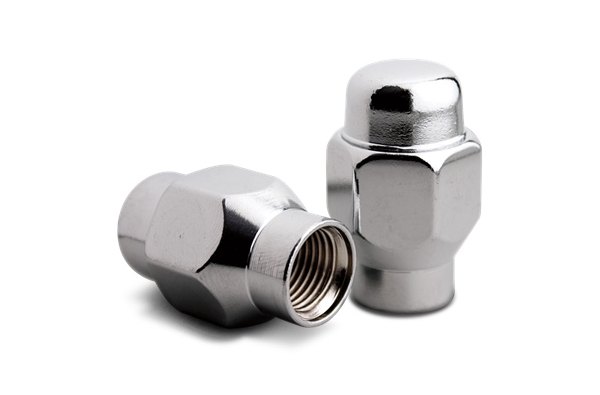 ET lug nuts have a small threaded shank, providing a bit more thread engagement compared to a regular lug nut.
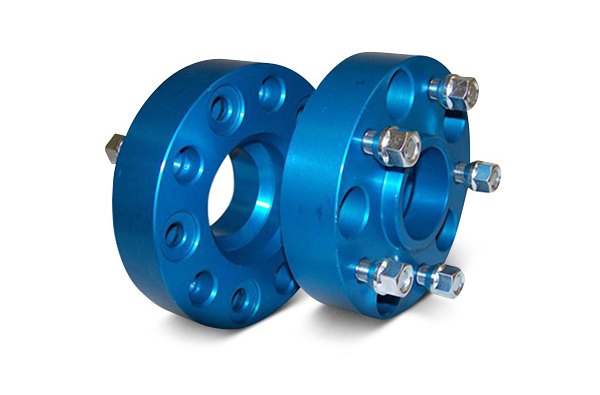 Wheel adapters are spacers complete with wheel studs, which will also ensure that you have full thread engagement for your lug nuts.
Other times, a spacer/adapter (a spacer plate with its own studs or threaded holes) will solve the problem. Be safe! Make sure that your wheels are properly and securely attached.
Hub Centric Rings
If you’re installing aftermarket rims, another factor to consider is the fact that some aftermarket wheels are built with an oversized center bore (circular opening at the center) that has a larger diameter than the wheel hub of the vehicle(s) they’re designed to fit onto.

When too large a gap exists here, the new wheel will not be “hub centric” as it should be. Such a gap may not even be noticeable to the eye, but it can cause a shimmy when the wheel rotates.
So if the outer diameter of your new wheel’s center bore is larger than the inner diameter of your existing wheel hub, a set of hub centric rings (also known as “hub centering” rings) will fill this gap and eliminate any loose fitment issues. We’ve got the Project Kics Hub Centric Ring that’s available in a variety of sizes to fit your needs.
Hub centric rings are also useful if you’re swapping OEM rims from one vehicle make to another with a matching bolt pattern, but a smaller hub.
The nice thing about the "washer method" is that it costs very little money, involves no guesswork, only needs to be done on one wheel per axle, and can be done in your garage or driveway. Once you have "that number", order up the appropriate wheel spacer, bolt up your wheels, and enjoy the ride!